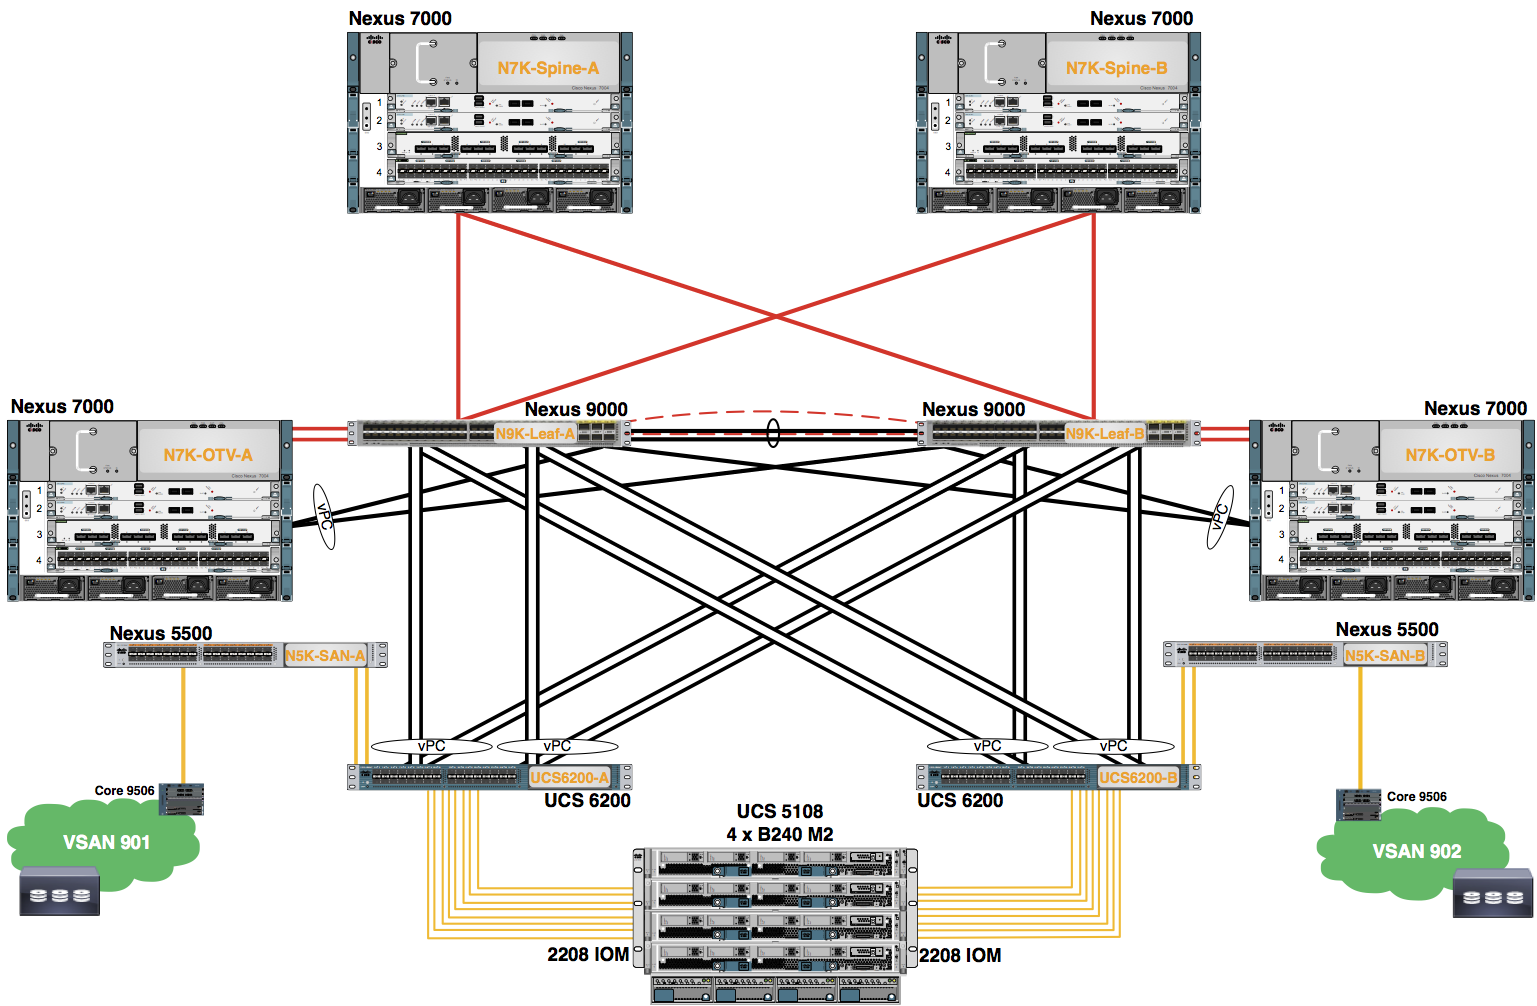
Module 2: Configure Ethernet Uplinks and Port Channels
Configure Ethernet Uplinks
Configure the Pod assigned ports as Ethernet Uplink Ports on the Fabric A and Fabric B Interconnects.
Procedure
- In the Navigation pane, click Equipment.
- Expand Equipment.
- Expand Fabric Interconnects.
- Click on
Fabric_Interconnect_Name . - In the right work pane, click Physical Ports
- Click Ethernet Ports
- CLick the + (plus) to expand the Ethernet Ports
- Shift+Click to select the ports. Right-click the selected ports
- Choose Configure as Uplink Port from the drop-down menu.
Note: Substitute one of the Fabric Interconnects from the table.
| Student | Fabric | Ports |
|---|---|---|
| Student | A | |
| B |
Note: Select the ports associated with the Fabric Interconnect from the table above.
- Choose Yes from the pop-up window to complete the configuration.
- A pop-up window appears indicating the Uplink Ports were successfully created. Click the OK button to close this window.
- Verify the status of your port(s) are Up in the work pane.
 Repeat this procedure to configure the Uplink Ports for Fabric A and Fabric B.
Configure Uplink Ethernet Port Channels
Configure the Pod assigned Uplink Ethernet Port-Channels on the Fabric A and Fabric B Interconnects. Two Port-Channels are created.
Procedure
- In the Navigation pane, click LAN.
- Expand LAN
- Expand LAN Cloud
- Click the
Fabric_Interconnect_Name node. - Choose Create Port Channel from General tab of the Work pane.
Note: Substitute one of the Fabric Interconnects in the table.
| Student | Fabric | ID | Ports |
|---|---|---|---|
| Student | A | ||
| B |
- Use the information in the table above to complete the fields in the Set Port Channel Name dialog boxes. Click the Next button.
- Shift+Click to select the ports.
- Click >> to move the ports to the Ports in the Port-Channel work pane element.
Note: Select the ports associated with the Fabric Interconnect and Port Channel ID in the table above.
- Click the Finish button.
- A pop-up window appears indicating the Port Channel was successfully created. Click the OK button to close this window.
 Repeat this procedure to create the Port-Channels for Fabric A and Fabric B.
- Verify the status of the Port-Channels.
- Expand LAN > LAN Cloud > Fabric A node.
- Expand the Port Channels node.
- Select the Port-Channels one at a time.
- Verify the status is Up in the work pane.
The status of the Port-Channel should change to Up in a few minutes.
Example from Student A's perspective:

