Module 1: Configure Named VLANs
Create Named VLANs that correspond to the VLANs configured on the Nexus switches. The VLANs created are accessible to both Fabric Interconnects.
Procedure
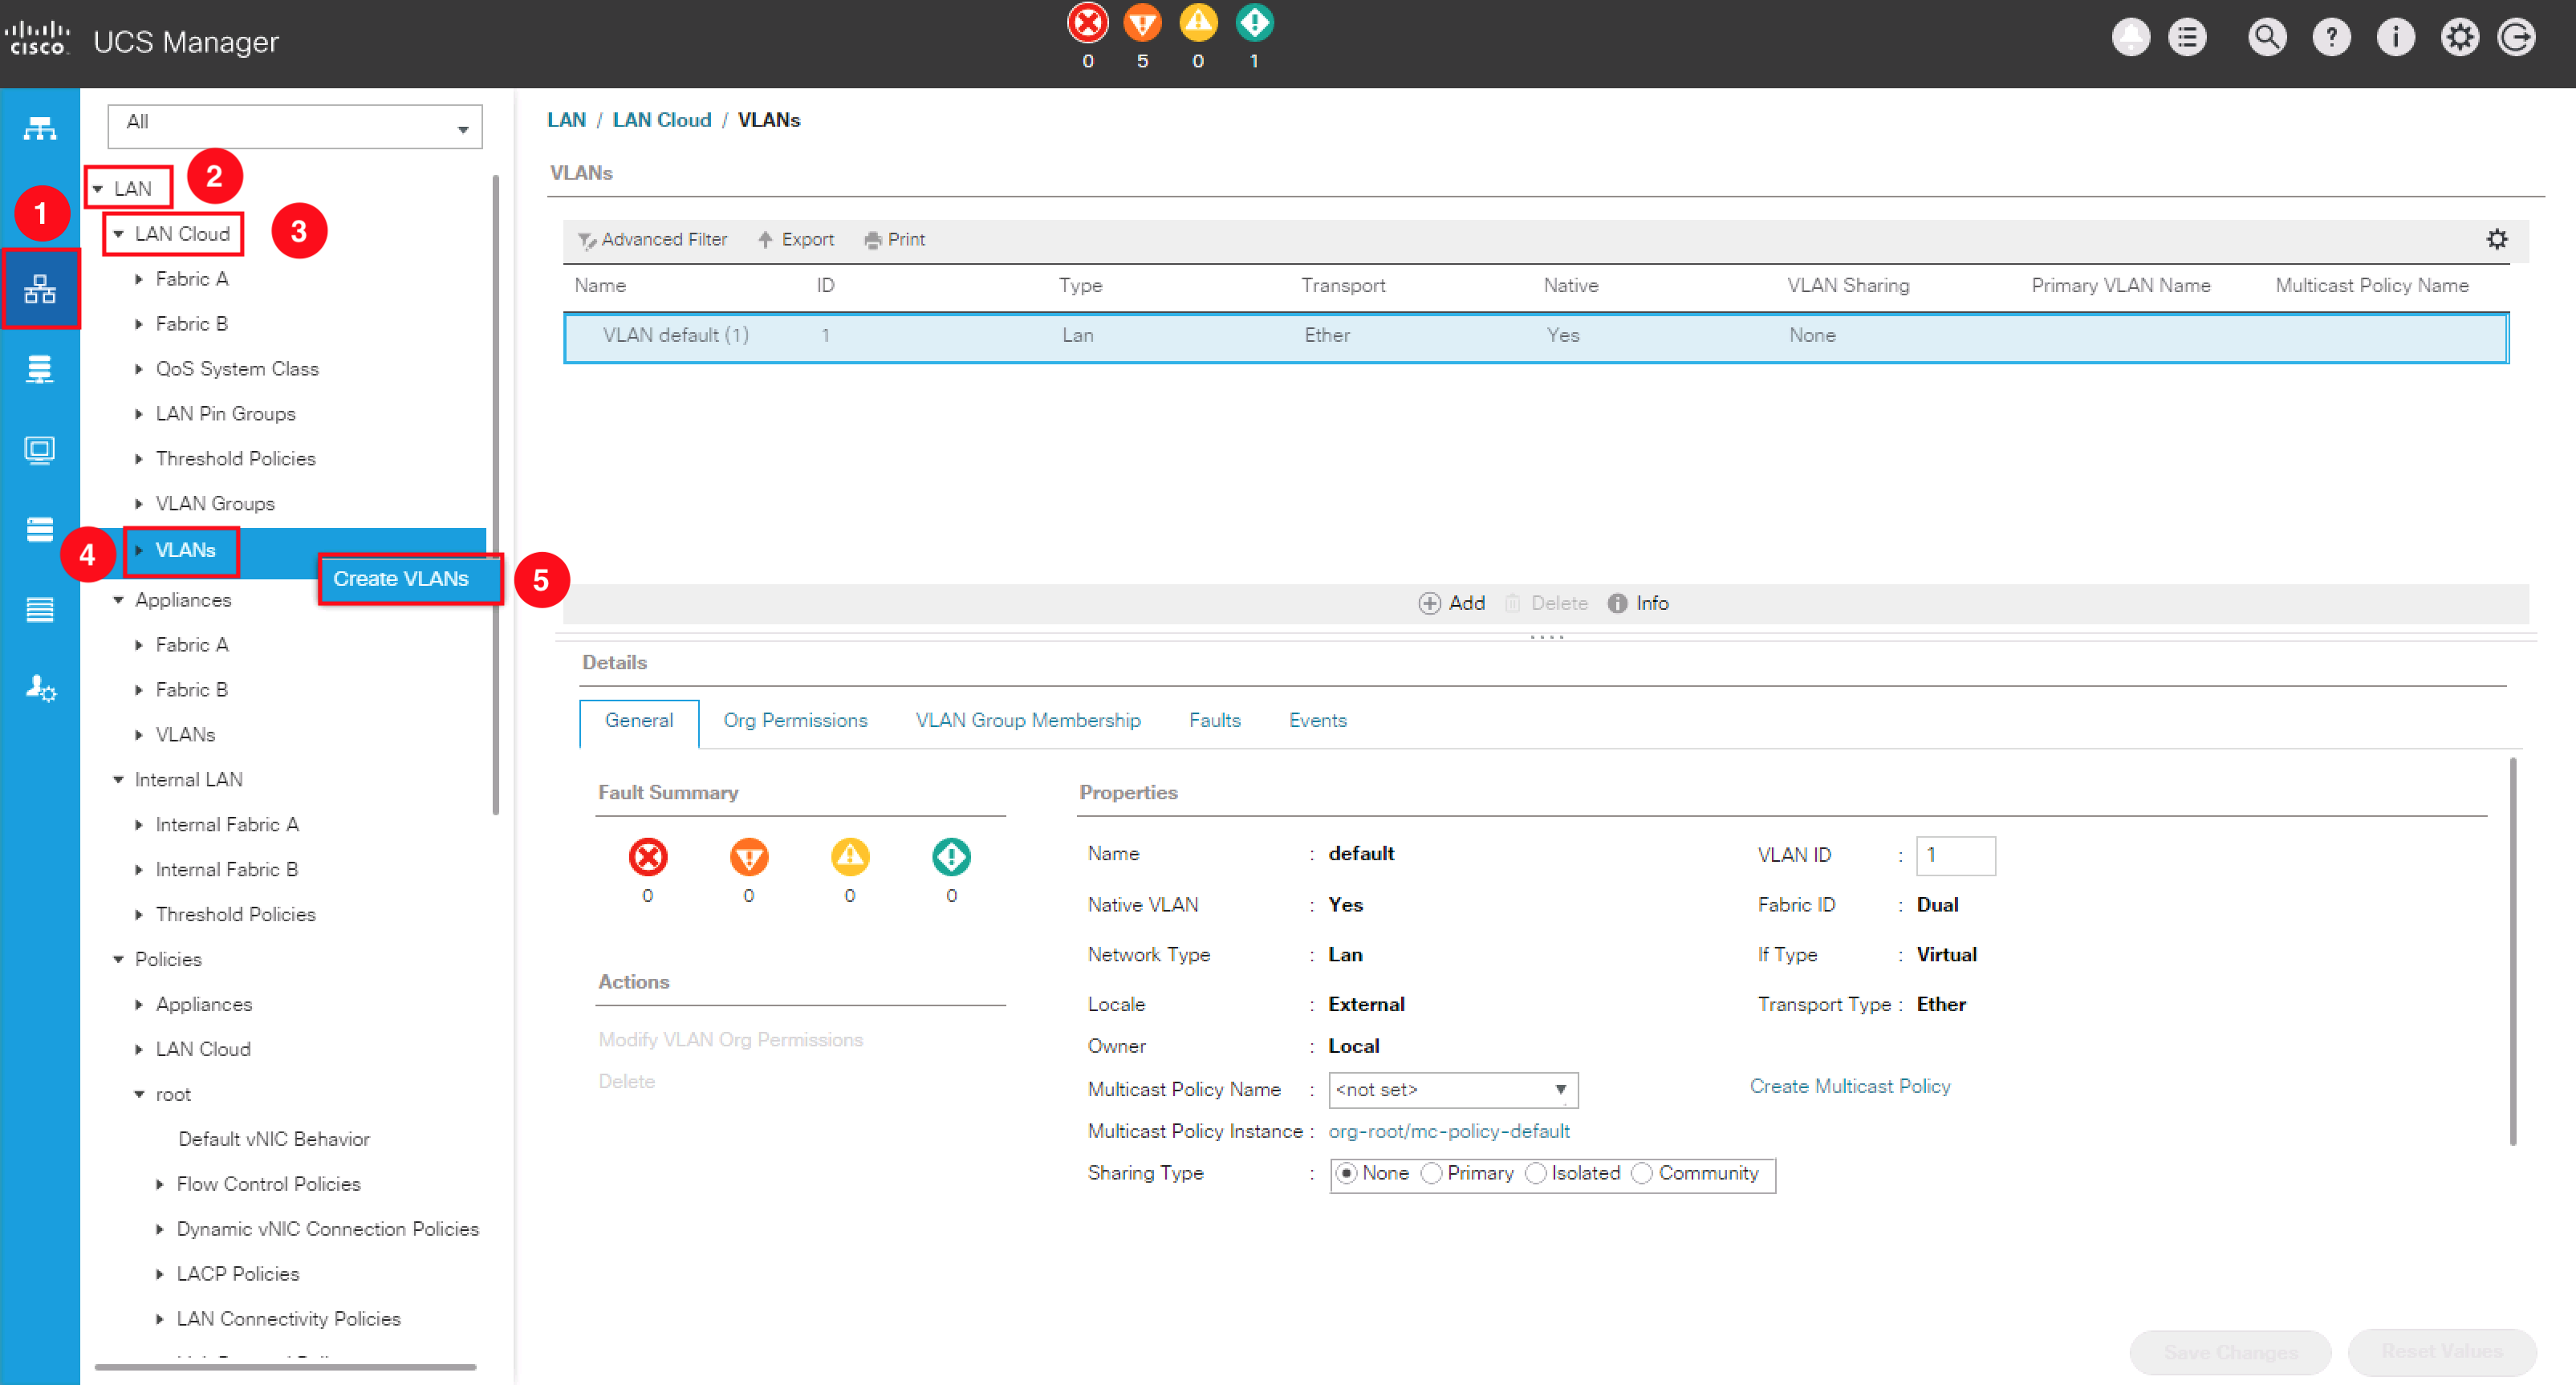
- In the Navigation pane, click LAN.
- Expand the LAN node.
- Expand the LAN CLoud node.
- Right-click the VLANs node.
- Choose Create VLANs from the drop-down menu.

- Use the following information to complete the fields in the Create VLANs dialog box.
- Click the OK button to create the VLANs.
| VLAN Name/Prefix | Pod0- Note: Include the dash at the end. The VLAN name is case sensitive. |
|---|---|
| Configuration Options | Common/Global |
| VLAN IDs | |
| Sharing Type | None |
- Click the OK button to create the VLANs.
- A pop-up window appears indicating the VLANs were successfully created. Click the OK button to close this window. The created VLANs appear in the VLANs work pane.

